Base Inspection
After the base layer has been plastered for approximately 15 days, a thorough inspection of the surface is conducted. The verticality and flatness should not exceed 2mm. Any cracks, hollow areas, or holes from scaffolding and loading openings must be repaired using high-strength cement mortar with an early strength agent. During the plastering process, ensure that the surface is evenly applied and smoothed. The moisture content of the wall should remain below 8%, and the pH level should be under 10 to ensure proper adhesion of subsequent layers.
Surface Preparation
1) Remove any loose dust, debris, or oil from the wall surface using a putty knife. Apply an epoxy primer to the plastic walls and fill any sunken areas with polymer anti-crack mortar. Use specialized putty to fill in the depressions and smooth out any raised sections, ensuring a flatness of less than 1.5mm.
High-End Finish Treatment
2) Reinforce the surface by applying fiberglass mesh. Apply crack-resistant mortar over the alkali-resistant glass fiber mesh and then cover it with another layer of the same material. The width of the application should extend at least 2cm beyond the edges of the mesh to ensure full coverage and durability.
Putty Application Process
1) Begin with the first coat of leveling putty, using a special trowel to apply it from top to bottom and left to right. Maintain steady pressure during application to avoid leaving visible marks. This step ensures a smooth and even base.
2) Sand the dried putty using 150# to 220# sandpaper after 4 hours. This helps remove any uneven spots and prepares the surface for the next coat.
3) Apply the second layer of putty using a trowel, ensuring no gaps or joints are left. The second coat must be applied in one go to maintain a seamless finish.
4) After drying, repeat the sanding process with 200# to 300# sandpaper. Special attention must be given to smoothing the edges around any holes before proceeding. The time between coats should be at least 4 hours, and water should be kept available during the process to prevent the putty from drying too quickly.
Primer Application
The primer used has strong bonding properties, which help integrate the plaster layer with the putty base. It enhances waterproofing, neutralizes the base, and prevents efflorescence. Apply the primer using a short-nap roller, ensuring even coverage without drips or missed spots.
Joint Setting
The positioning, width, and direction of the joints are determined according to the engineering design. Once the joints are marked, lines are drawn to ensure consistent width and alignment. The joint area is first coated with an epoxy sealant primer, followed by a high-gloss black fluorocarbon paint to enhance visibility and aesthetics.
Elastic Coating Application
A high-performance elastic paint in matching colors is used to create a three-dimensional effect on the wall. It effectively prevents cracking and can be combined with fluorocarbon metal paint for enhanced adhesion. Apply the paint using a fine nap roller, ensuring the pattern is consistent and even.
Elastic Fluorocarbon Intermediate Coat
This layer provides excellent adhesion, integrates well with the base, covers small pinholes, and improves waterproofing. It also works in harmony with the topcoat to achieve the desired color and finish. Mix the intermediate paint with the curing agent and thinner as specified, and apply it with a short-nap roller, ensuring no sagging or missing areas.
Elastic Fluorocarbon Metal Paint Application
This topcoat offers complete protection to the entire coating system, with superior weather resistance and a metallic sheen. Mix the topcoat base, curing agent, and thinner in the correct proportions, let it mature for 30 minutes, and then spray the surface from left to right and top to bottom, ensuring even coverage. Avoid over-spraying to prevent issues like blooming or sagging.
Lacquer Application
The final lacquer layer enhances weather resistance, water resistance, and self-cleaning properties. Apply it following the same procedure as the metal paint—mix the components, let them rest for 30 minutes, and spray evenly from left to right and top to bottom. Ensure the finish is uniform to avoid defects such as streaks or uneven thickness.
Additional Notes
1) Construction should only take place when humidity is below 85% and temperatures range between 5°C and 40°C. Avoid working during rain, snow, fog, frost, or strong winds.
2) After sanding, rinse the surface with clean water and allow it to dry completely before applying paint.
3) The paint film requires about 7 days to fully cure. It's recommended not to use the surface before this period.
4) Stir all components thoroughly as instructed and use them within 30 minutes after mixing.
5) All mixed materials must be used within the specified time frame. If they are not used in time, they should not be reused.
6) Only use the designated accessories provided with the product. Do not substitute with other commercially available materials.
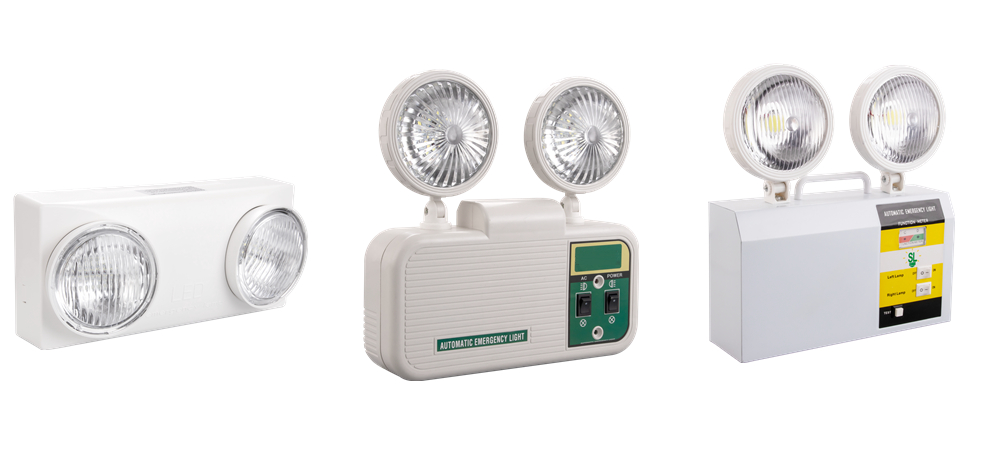
Commercial electric LED emergency double heads light is perfect for applications requiring a dependable, long lasting, energy efficient life safety solution with a traditional design. The twin heads emergency light is designed with injection-molded, flame-retardant, high impact thermoplastic housing .The adjustable heads allow for optimal lighting of the path of egress.

Emergency Exit Lights,2 Head Emergency Light,Twin Spot Emergency Light,Led Twin Spot Emergency Lights
Jiangmen City Pengjiang District Qihui Lighting Electrical Appliances Co., Ltd , https://www.qihuilights.com